Meadow FAQ
We’ve had a few questions come up multiple times since we began work on the building 33 meadow. We figured others were probably wondering the same thing, so it might be time to write things up and put it on the website. If you have other questions, please let us know what’s on your mind!
- Can I add a meadow at home?
- I want to help the monarchs. What plants do I need?
- Where can I purchase native plants?
- What about container gardening?
1. Can I add a meadow at home?

MOTHER NATURE NEEDS YOUR HELP
Of course you can add a meadow at home. And, you should! Congratulations for recognizing that the need to support biodiversity far outweighs the need to conform to our current standard for home landscaping. While your neighbors may feel compelled to have acres and acres of turf grass, it’s simply not sustainable and is dramatically contributing to the global mass extinction (the 6th in Earth’s history) currently facing our planet.
THE LONG HAUL
Before getting started, let’s take some time to go over expectations. Remember that meadows are beautiful, productive areas… but they are not created overnight. Consider yourself in it for the long haul. On average, it takes three growing seasons before your meadow will be fully mature and self-sufficient when starting from seed. That may sound like a long time, but you’re really just front-loading your efforts. After that three-year mark, maintenance is minimal! That’s when you sit back and enjoy the fruits of your labor. If you’re unsure about your commitment level, start small. While most people think of meadows as large expanses of open area, even a small area will provide significant benefits over lawn. Start with an area you’re sure you can handle. Once you get the hang of things, every year carve out a little more and keep growing.
MEADOW RECIPE
Now that you know the general timeline, let’s talk about the basic steps of the conversion process (adapted from From Nightmare Lawn to Happy Meadow in 5 Easy Steps ):
- REMOVE THE GRASS. As our Dr. Sara tell us, the number one reason a meadow fails is because the site is not properly prepared. It’s bett
 er to put in the extra time and effort up front rather than try to recover from some major mistakes. Depending on the size of your area, there are several ways to tackle turf grass removal. You can remove by hand with a spade or opt to use a sod cutter, hauling away the removed sod. Alternatively, you can smother the grass with either a newspaper / cardboard “lasagna” approach or by applying a layer of plastic as we did with the B33 meadow. The option to use an herbicide is always there, but if you’re doing this to help nature, using a pesticide really doesn’t seem like the right approach. Whichever method you choose, you want to minimize soil disturbance as much as possible. The soil contains weed seeds just waiting to reach the surface where sunlight and water abound. Those weed seeds are not your friends. Keep them buried, and buried deep.
 - DO NOT AMEND THE SOIL. Yes, I know this goes against everything in you, telling you that you need to add compost or top soil or, just, just… something! Don’t do it. In fact, native plants LIKE really bad soil. If you amend your plot, you’ll actually just end up helping out the weeds that venture in. They like extra nutrients and will happily thank you by outcompeting all of your desired plants. About the only thing you should add is a sulfur-based compound if your soil pH is too high. Again, native plants are what you’re catering to here. And, in general, they like acidic soil. If yours is above pH 7 or so, consider adding something to bring the pH down to 5.5 to 6.
- SOW THE SEED. You should be able to broadcast your seed by hand. Use a neutral medium such
 as sand to make this process easier. Get an old bucket and fill it about half-way with sand. Throw in a bit of water to moisten the mixture, then add your seed. Mix the bucket until your seed is thoroughly mixed in, then start flinging the mixture over your site. The sand will allow you to see where you’ve put the mixture. Try and evenly distribute the mixture as best you can. Next, lightly rake the area to further even out coverage. Just don’t go too deep… remember we want to keep the weed seeds hidden away. Finally, you want to press the seeds into the soil to ensure good soil contact. If you have a lawn roller, that’s a great tool for this part of the process. If not, just walk over the entire area and you’ll accomplish the same thing.

- MULCHING. Depending on the time of year, you may want to consider mulching over the entire area with some straw. This will help maintain moisture levels and provide some relief from the summer sun for tender seedlings. If you do mulch, it must be clean! Do not use field hay – it is full of weed seeds. Just apply a thin layer as you don’t want to smother baby plants.
- WATERING. Particularly if you’re planting in the spring, you will need to water until your plants are established. This normally means daily watering until plants are about 8 weeks old. After that, weekly watering should suffice unless there is a hard drought. If you instead decide to plant late in the fall, snow cover will help provide protection and water that your meadow needs to thrive in the spring.
WEEDING: SNIP, DON’T PULL
 After these initial steps, you’ll need to remain vigilant. Despite your best efforts, you’re sure to get plenty of weeds coming up. Stay on top of things! You know the saying - an ounce of prevention is worth a pound of cure. In the case of meadow making, that might even be ten pounds of cure! In other words, if you get a proliferation of weeds, it’s really difficult to get it back under control. As for the method of weed removal, it’s best to simply snip the weed at the soil surface. As much as you may want to pull them up by the roots, which is oh so satisfying, you’ll end up disturbing the soil so much you’ll likely make 50 new weeds for every one you pull up. Work smarter, not harder! If you have time, do a check about once a week as different weed seeds will germinate at different times. The first growing season is key, but even the second season is extremely important. Don’t fall asleep on your watch.
SEED VS. PLANTS
If this seems like a daunting task and money is less of a concern, consider using plants over seed. Young plants will give you an advantage over starting from seed. The plants will have a size advantage over any weed seedlings trying to come up. The bigger plants will shade out the smaller weeds, and in general, have an easier time competing for water and nutrients. You’ll also have a much easier time telling good plants from bad. When using seed, unless you’re an experienced gardener, you’ll likely find it pretty tough to know exactly what’s coming up where. By the time the seedlings mature and you can tell desired native from unwanted weed, that battle has already been waging and your little natives may have struggled and suffered. Depending on the size of your site, however, using plants may just be unrealistic – too big of an area would be nearly impossible to plant. If you do decide to use plants, consider over-planting. Minimize the space between plants as that is simply an invitation for weeds to move in. And, if you’re thinking, “Oh, I’ll just put some wood mulch down and that will do the trick…” think again. The best “mulch” is green mulch. In other words, the best mulch is just more plants.
IT’S ALL WORTH IT
In the end, you’ll have a beautiful, lively, thriving ecosystem full of buzzing bees and graceful butterflies, along with a host of other insects and happy critters. And, you’ll be part of the solution this world so desperately needs right now. Make that your inspiration and your motivation to keep removing those pesky weeds… even when you’d rather do almost anything else!
For more information, the web has more resources than you could hope for; here are a few to get you started:
https://conservationtools.org/guides/151-from-lawn-to-meadow
https://www.plna.com/page/AlternativesToLawns
https://wildseedproject.net/2017/01/return-of-the-meadow/
http://pss.uvm.edu/ppp/pubs/oh84mead.htm
2. I want to help the Monarchs. What plants do I need?
 In short, you want to support the entirety of the Monarch lifecycle, so you’ll need both host plants and nectar plants. When most people think of Monarchs, they conjure up images of the iconic orange and black butterfly. But, the quirky yellow, black and white-striped caterpillar is just as important. Your garden should contain plants that support both the adult butterfly and the larval, or caterpillar, phase. And, as much as possible, these plants should be natives.
 So, what does a Monarch caterpillar eat? Turns out, these little guys are extremely picky eaters. The Monarch caterpillar will only eat its host plant, species in the Milkweed family. There are several types of Milkweed, and in my experience, the caterpillars seem to favor different varieties in different years. My suggestion is to get a few different types, but ones that are native to this area and suitable to the conditions of your site. You will need an area that gets a good deal of sun – in general Milkweed does not fare well in shady conditions.
If you have plenty of room, consider the Common Milkweed. This one gets quite tall, upwards of four feet, and with time will expand its territory through fairly aggressive rhizomes. This makes it a poor choice for small, formal gardens. It has a beautiful dusky rose flower in summer with a fragrance equally enchanting.
If you have a moist area, Swamp Milkweed is your go-to. This one loves to have wet feet! It has a deeper pink flower in summer and won’t grow so stall, generally staying under three feet. It’s also much more well-behaved, staying where you plant it.
For drier conditions or in smaller settings, Butterflyweed should do. This one has fiery orange flowers in summer and stays quite compact, not getting higher than 1.5 to two feet in the most ideal conditions. And, like Swamp Milkweed, this one will not be overly aggressive and take over your yard.


Common Milkweed, Swamp Milkweed and Butterfly Milkweed (L-R).
Some other choices for our area include Whorled Milkweed, Purple Milkweed, and Green Comet Milkweed. These are less common than the three previously mentioned, but may be more suitable choices given your site conditions. However, these will be a bit tougher to find for sale … though it can be done.
Finally, for the adult butterfly, your choices are much greater. An adult butterfly can feed on just about any flower that has nectar. Of course, it has preferences and there has been discussion in terms of native plants offering nectar that is more nutritious than that of non-natives. Here, you want to offer many choices. Perhaps the most important consideration is to have a variety of plants with bloom times to cover the entire growing season. While the majority of Monarchs migrate through our area in late summer to fall on their way to Mexico, we still have butterflies coming through all summer long. You want to offer them a place to rest and refuel. Some good choices include: black-eyed-susan, spotted bee balm, Joe-pye Weed, blue mistflower, and for later in the season, asters and goldenrods.
The Xerces Society has wonderful guides on Monarch Butterflies and the Eastern US and Monarch nectar plants of the Mid-Atlantic.
3. Where can I purchase native plants?
“Native plant sale.” Ah, my three favorite words.

If you’re reading this, you’re already convinced how important native plants are in our environment. Now, you want to know where you can purchase them. The good news is it’s getting easier and easier with every year. More people are catching on and creating demand for these plants. And, with capitalism being king, more suppliers are popping up. While this discussion is not meant to be all-inclusive nor is it endorsing any one vendor, we want to help you get started. Once you’ve joined the native plant community by attending a plant sale or visiting a native plant nursery, you’re likely to hear of more. An initial list is below.
IMPORTANT NOTE! The big box stores are typically not the best place to purchase plants. They have limited selection, if any native plants, and you have to be careful about treatment with pesticides. Remember, you’re purchasing native plants so local insects have a much needed food source. If your plant is treated with any sort of pesticide, you’re completely defeating the purpose. Neonicotinoids, in particular, are very harmful and are present not only on the foliage, but also in nectar and pollen. Be wary!
Local nurseries:
Behnke’s Nursery – Has a nice selection of “Bay Safe” plants mixed in with non-natives
Herring Run Nursery – open only certain times, but AMAZING selection
Lauren’s Garden Service – both online and brick-and-mortar
Plant sale events:
Howard County GreenFest – always in April
Robinson Nature Center’s NativePlantPalooza – in May
Websites to learn more:
Maryland Native Plant Society – List of Retailers
Choose Natives – List of Retailers
Native Plants for Wildlife Habitat and Conservation Landscaping – Chesapeake Bay Watershed
4. What about container gardening?
"A garden requires patient labor and attention. Plants do not grow merely to satisfy ambitions or to fulfill good intentions. They thrive because someone expended effort on them."
-Liberty Hyde Bailey
Botanist, farmer, philosopher, and public intellectual
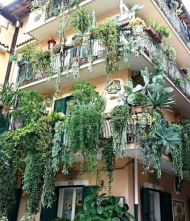 We often think of gardens as plots in the yards of single-family homes. But, what if that isn’t your living situation? Perhaps you only have a balcony, a concrete patio, or a tiny yard space. Can you still garden or grow plants? Of course! Consider container gardens. Even the International Space Station is growing plants, so anywhere on Earth should be fair game!
Containers may make sense even if you do have room for typical gardens. You can move them to a more suitable location with respect to sunlight and other conditions that better support their  growth. You can also move them to protect them from browsing animals or the cold in the winter. A container may be a “safe” spot to try an aggressive plant you worry about spreading or a shy plant you worry may be overshadowed. There are so many reasons that a container may be the perfect fit for your gardening needs.
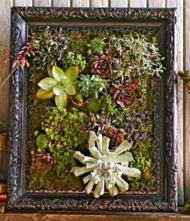
You can also show off your creative side with containers. Searching Google images, you will find plants in a pallet frame, old barbeque grills, dresser drawers, and even an old picture frame.
You can plant just about anything in a container. Fruits or vegetables for food can be grown in containers. Nectaring flowers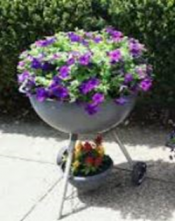 can be planted for bees and butterflies, including milkweed as a host plant for Monarch butterflies. The list of container types and plants to include in them is endless. Get some resources to get you started. While there is no endorsement on what specific resources to use, you might enjoy the book “Small-Space Container Gardens” by Fern Richardson. Otherwise, some helpful websites include:
https://extension.umd.edu/hgic/topics/container-gardening
https://www.audubon.org/news/brighten-your-balcony-or-patio-diy-native-plant-garden
https://www.gardeningknowhow.com/special/containers/novice-container-gardening-tips.htm